Digital 3D files have changed the way engineers work with manufacturers. Engineers can now design a part using CAD software, send the digital file to a manufacturer, and have the manufacturer make the part directly from the file using digital manufacturing techniques like CNC machining.
But although digital files have made manufacturing faster and simpler, they haven’t totally replaced the art of drafting, i.e. the creation of detailed, annotated engineering drawings. These 2D drawings might seem outdated compared to CAD, but they are still an important way to provide information about part design — especially information that a CAD file can’t easily convey.
This article looks at the basics of 2D drawings in engineering: what they are, how they work in relation to digital 3D models, and why you should still submit them to the manufacturing company along with your CAD file.
What is a 2D drawing?
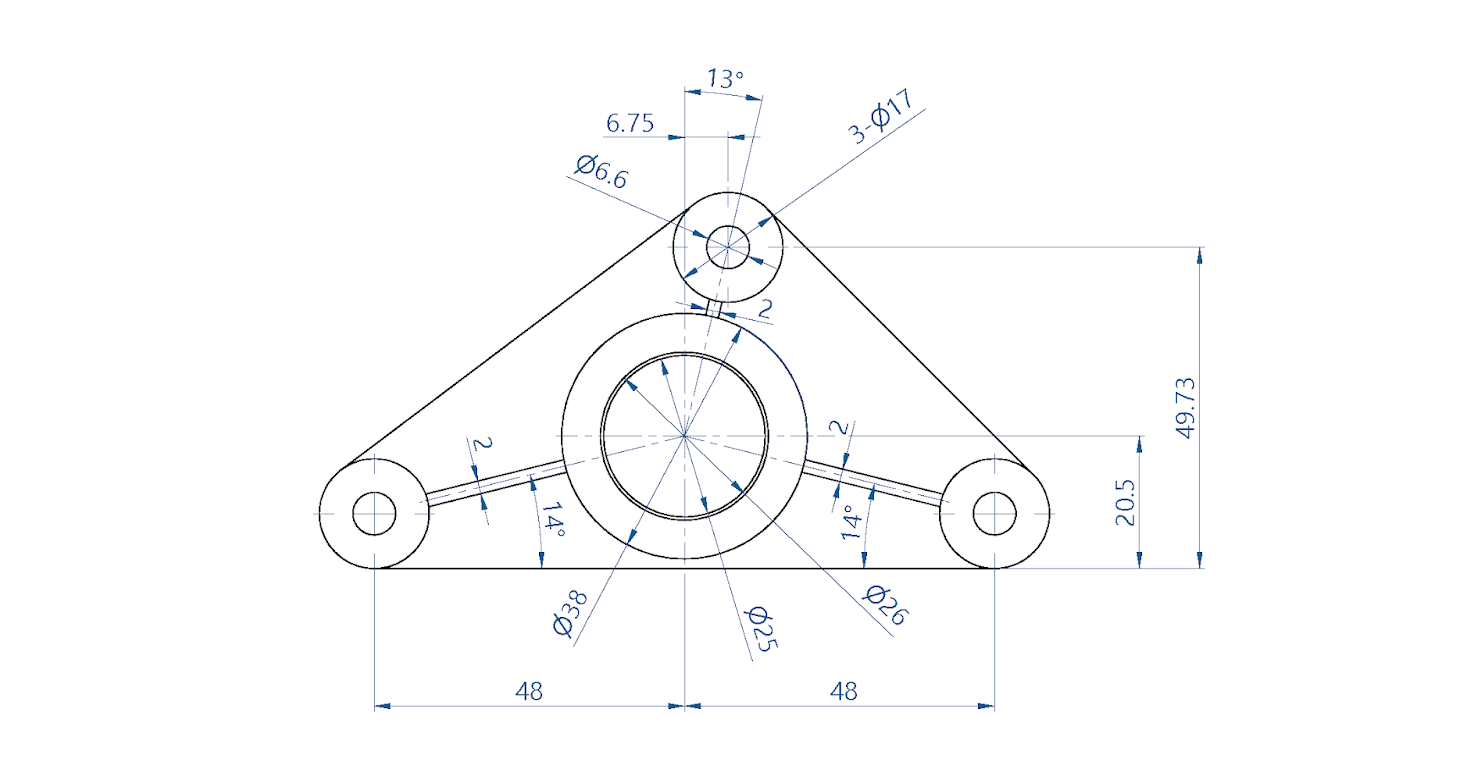
In the world of engineering, a 2D drawing or engineering drawing is a type of technical drawing that conveys information about a part, such as its geometry, dimensions, and acceptable tolerance.
Unlike a digital CAD file, which represents an unmade part in three dimensions, an engineering drawing represents the part in two dimensions. But these two-dimensional views are just one feature of a 2D technical drawing. Besides the part geometry, a drawing will contain quantitative information such as dimensions and tolerances, and qualitative information such as the part’s designated materials and surface finishes.
Typically, a drafter or engineer will submit a set of 2D drawings, each of which shows the part from a different view or angle. (Some 2D drawings will be detailed views of particular features.) The relationship between the various drawings is usually explained via an assembly drawing. Standard views include:
- Isometric views
- Orthographic views
- Auxiliary views
- Section views
- Detail views
Traditionally, 2D drawings have been made manually using drafting equipment, i.e. a drafting table, pencil, and drafting instruments for drawing perfect circles and curves. But today 2D drawings can also be made using CAD software. Once popular application is Autodesk AutoCAD, a piece of 2D drawing software that approximates the manual drafting process. And it is also possible to automatically generate 2D drawings from 3D models using common CAD software like SolidWorks or Autodesk Inventor.
2D drawings and 3D models
Because digital 3D models necessarily convey the shape and dimensions of a part, it may seem like 2D drawings are no longer necessary. In a certain sense, that is true: an engineer can design a part using CAD software, and that same digital file can be sent to a piece of machinery for manufacturing, without anybody ever picking up a pencil.
However, that doesn’t tell the entire story, and many manufacturers appreciate receiving 2D drawings along with CAD files when making parts for a customer. 2D drawings follow universal standards. They are easy to read, can be handled in a variety of settings (unlike a computer screen), and can clearly emphasize critical dimensions and tolerances. In short, manufacturers still speak the language of 2D technical drawings.
Of course, digital 3D models can do a lot of the heavy lifting, and 2D drawings are less necessary than they once were. But this is a good thing, as it allows engineers to use 2D drawings mainly for conveying the most important or unconventional pieces of information: specifications that might not be immediately clear from the CAD file.
In summary, 2D drawings should be used to complement a CAD file. By creating both, you are giving manufacturers the clearest picture of your requirements, reducing the probability of miscommunication.
Why 2D drawings are important
There are several reasons why 2D drawings remain an important part of the manufacturing workflow. Here are just a few of them:
- Critical features: Drafters can highlight important information on 2D drawings so manufacturers do not skip over anything important or misunderstand a potentially ambiguous specification.
- Portability: Printed 2D technical drawings can be easily moved, shared, and read in a range of environments. Viewing a 3D model on a computer screen is useful for manufacturers, but there may not be a monitor next to every machining center or post-processing station.
- Familiarity: Although all manufacturers are familiar with CAD, there are discrepancies between different digital formats. Drafting is an established technique, and the standards and symbols used on 2D drawings are recognizable by all in the business. Moreover, some manufacturers can assess a 2D drawing — to estimate its cost for a quote, for example — more quickly than they could assess a digital model.
- Annotations: Engineers will attempt to include all relevant information on a 2D drawing, but manufacturers, machinists, and other professionals may wish to annotate the design with their own notes. This is made simpler with a printed 2D drawing.
- Verification: By submitting 2D drawings that correspond to a 3D model, the manufacturer can rest assured that the specified geometries and dimensions have not been written down incorrectly.
- Extra information: Nowadays, a CAD file contains more information than just a 3D shape; it can stipulate information like tolerances and material choices. However, some things are more easily communicated in words alongside a 2D drawing.
For more information on 2D drawings, read our Everything you need to know about technical drawings blog post. If you already have your 2D drawings ready to go, submit them along with your CAD file when you request a quote.


